inajmi
Member
- Downloaded
- 21.6 GB
- Uploaded
- 71.2 GB
- Ratio
- 3.29
- Seedbonus
- 5,495
- Upload Count
- 0 (0)
Member for 9 years
How to Install Windows 2012 Hyper-V via Server Manager & Windows PowerShell. Monitoring Hyper-V Virtual Machines
Introduction to Microsoft Hyper-V
Our previous tutorials we covered the basic concepts of Virtualization and Windows Server 2012 Hyper-V. This article takes a closer look at Microsoft’s Hyper-V Virtualization platform and continues with the installation of the Hyper-V role via the Windows Server Manager interface and Windows PowerShell command prompt.
Hyper-V is a server role used to create virtualized environment by deploying different types of virtualization technologies such as server virtualization, network virtualization and desktop virtualization. The Hyper-V Server role can be installed in Server 2012 R2 Standard, Datacenter or Essentials edition. Hyper-V version 3.0 is the latest version of Hyper V server available in Windows Server 2012 R2 versions.
Hyper-V Hardware Requirements
The Hyper-V server role requires specific system-hardware requirements to be met. The minimum hardware requirements are listed in the table below:

Installing The Hyper-V Server Role in Server 2012 Using Server Manager
In Windows Server 2012, you can install Hyper-V server role by using the Server Manager (GUI) or windows PowerShell. In both cases, the installation requires the user to be an Administrator or member of Administrators or Hyper-V administrators group.
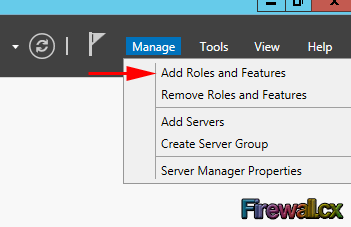
At first, open Server Manager. Click Manage and select the Add Roles and Features option:
Click Next on the Before you begin page.
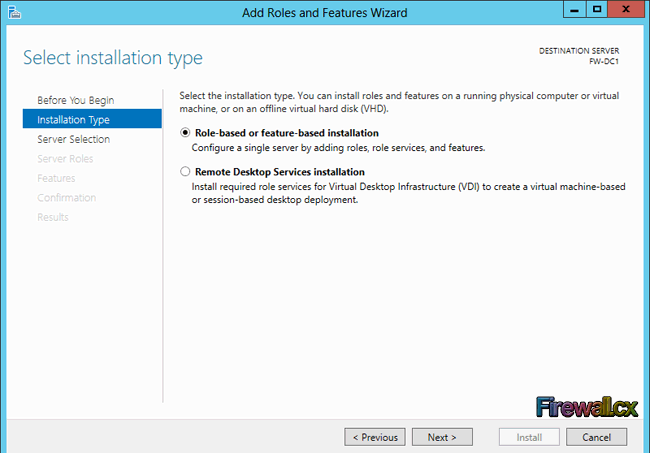
Choose Role-based or feature-based Installation option and click Next button:
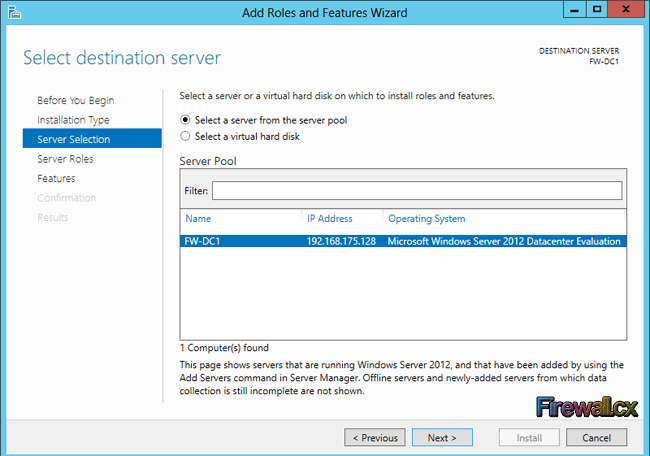
In the next window, click on Select a server from the server pool option and select the server where you would like to install the Hyper-V server role. Click on Next after selecting the server:
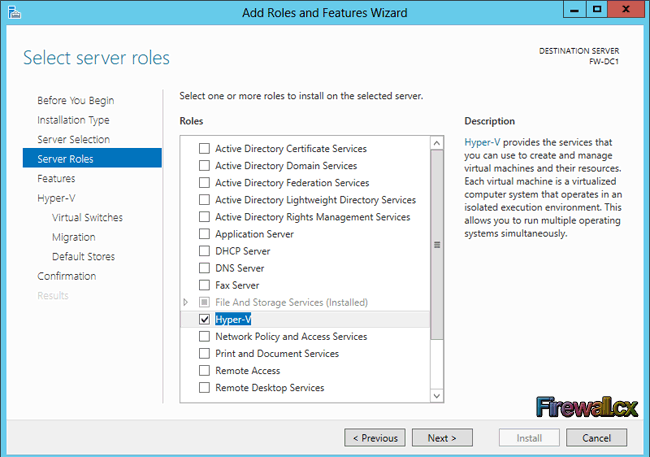
The next screen lists the available roles for installation, check Hyper-V and click Next:
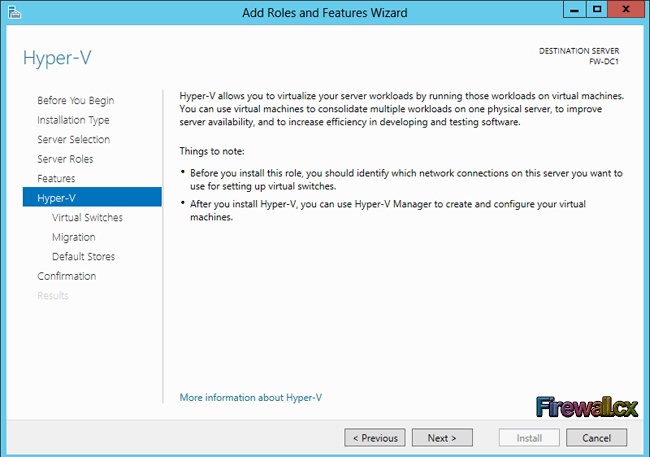
Read the Hyper-V role information and click the Next button:
The next step involves the creation of Virtual Switches. Choose your server’s physical network adapters that will take part in the virtualization:
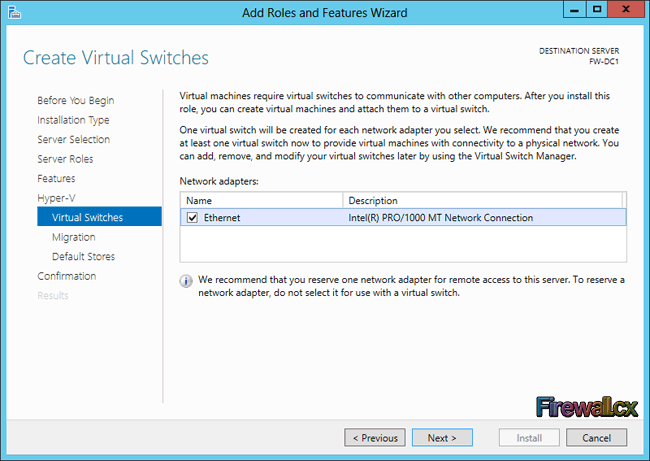
The selected physical network adapters (in case you have more than one available) will be used and shared by virtual machines to communicate with the physical network. After selecting the appropriate network adaptors, click Next to proceed to the Migration screen.
Under Migration, leave the default settings as is and click Next:
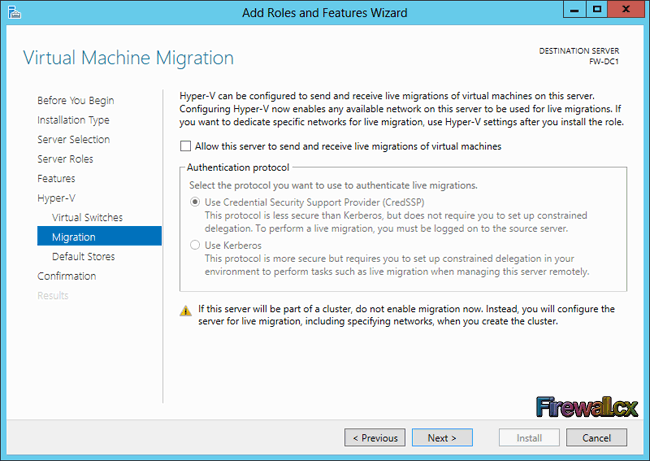
These settings can also be modified later on. Live Migration is similar to VMware’s vMotion, allowing the real-time migration of virtual machines to another physical host (server).
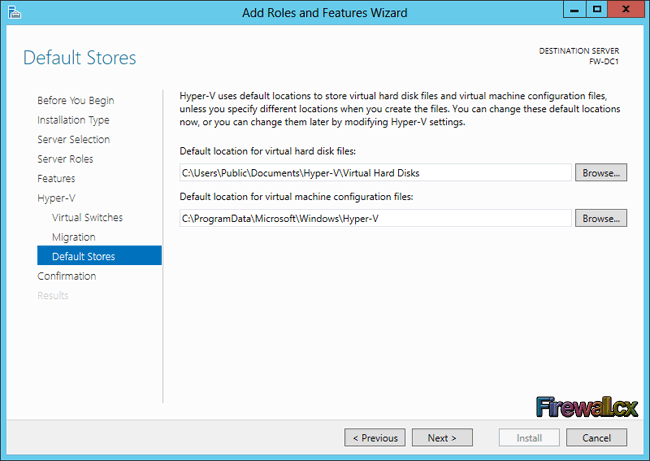
Under Default Stores, you can configure the location of hard disk files and configuration files of all virtual machines. This is a location where all the virtual machine data will reside. You can also configure a SMB shared folder (Windows network folder), local drive or even a shared storage device.
We will leave the settings to their default location and click the Next button.
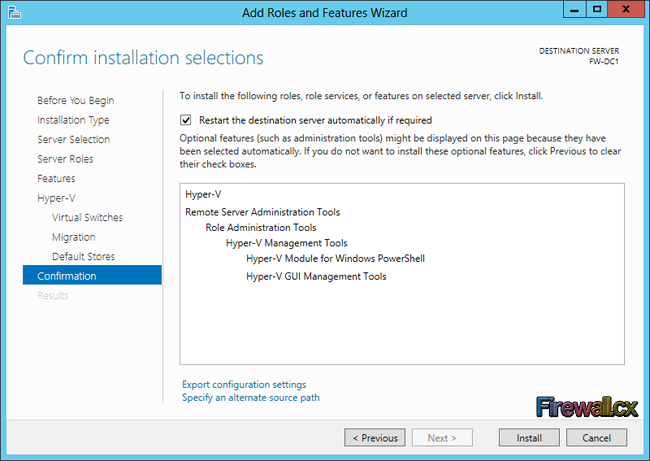
The final screen allows us to review our configuration and proceed with the installation by clicking on the Install button:
Windows will now immediately begin the installation of the Hyper-V role and continuously update the installation window as shown below.
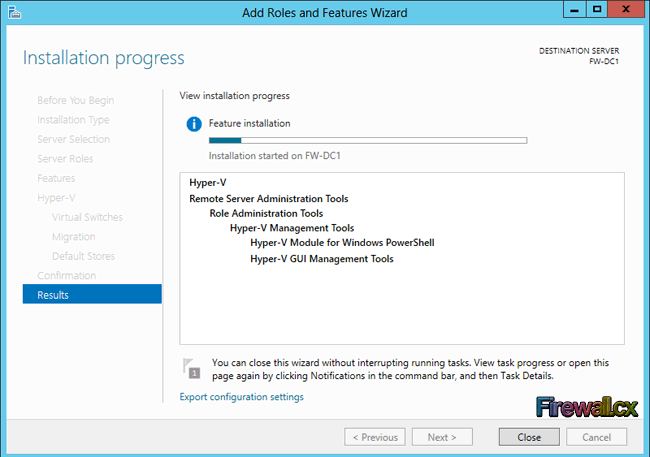
Once the installation of Hyper-V is complete, the Windows server will restart.
Source : Firewall.cx
 but this time he seems he forgot , he really choose the best of to know for Any IT