- Downloaded
- 207 GB
- Uploaded
- 35.2 TB
- Ratio
- 174.13
- Seedbonus
- 34,503
- Upload Count
- 217 (229)
Member for 5 years
So, you have installed a Windows OS in Virtualbox, and gotten it just the way you want it. Now you want to save it for posterity, or just in case your current VM has a brain fart and you need to reinstall it. Or, you decide you really like it and want it for a daily driver on a real hard drive. How do I do this you ask? Well, let me show you my way. Granted, your mileage may vary, but I have a 100% success rate doing this on my computer and have done more than 100 of this type of backup with NO errors. Make a VM and install Windows 10. Install as you normally would. After Install, activate Windows and install any programs you want. When you have TOTALLY finished, and have everything the way you want it, then proceed to next step.
Links for DISM++ and my .BIF files are located at bottom of thread
How I do it....
I have a windows 7 made specifically for this. For this example we will use the Win10Builder as the supposed OS we want to backup.
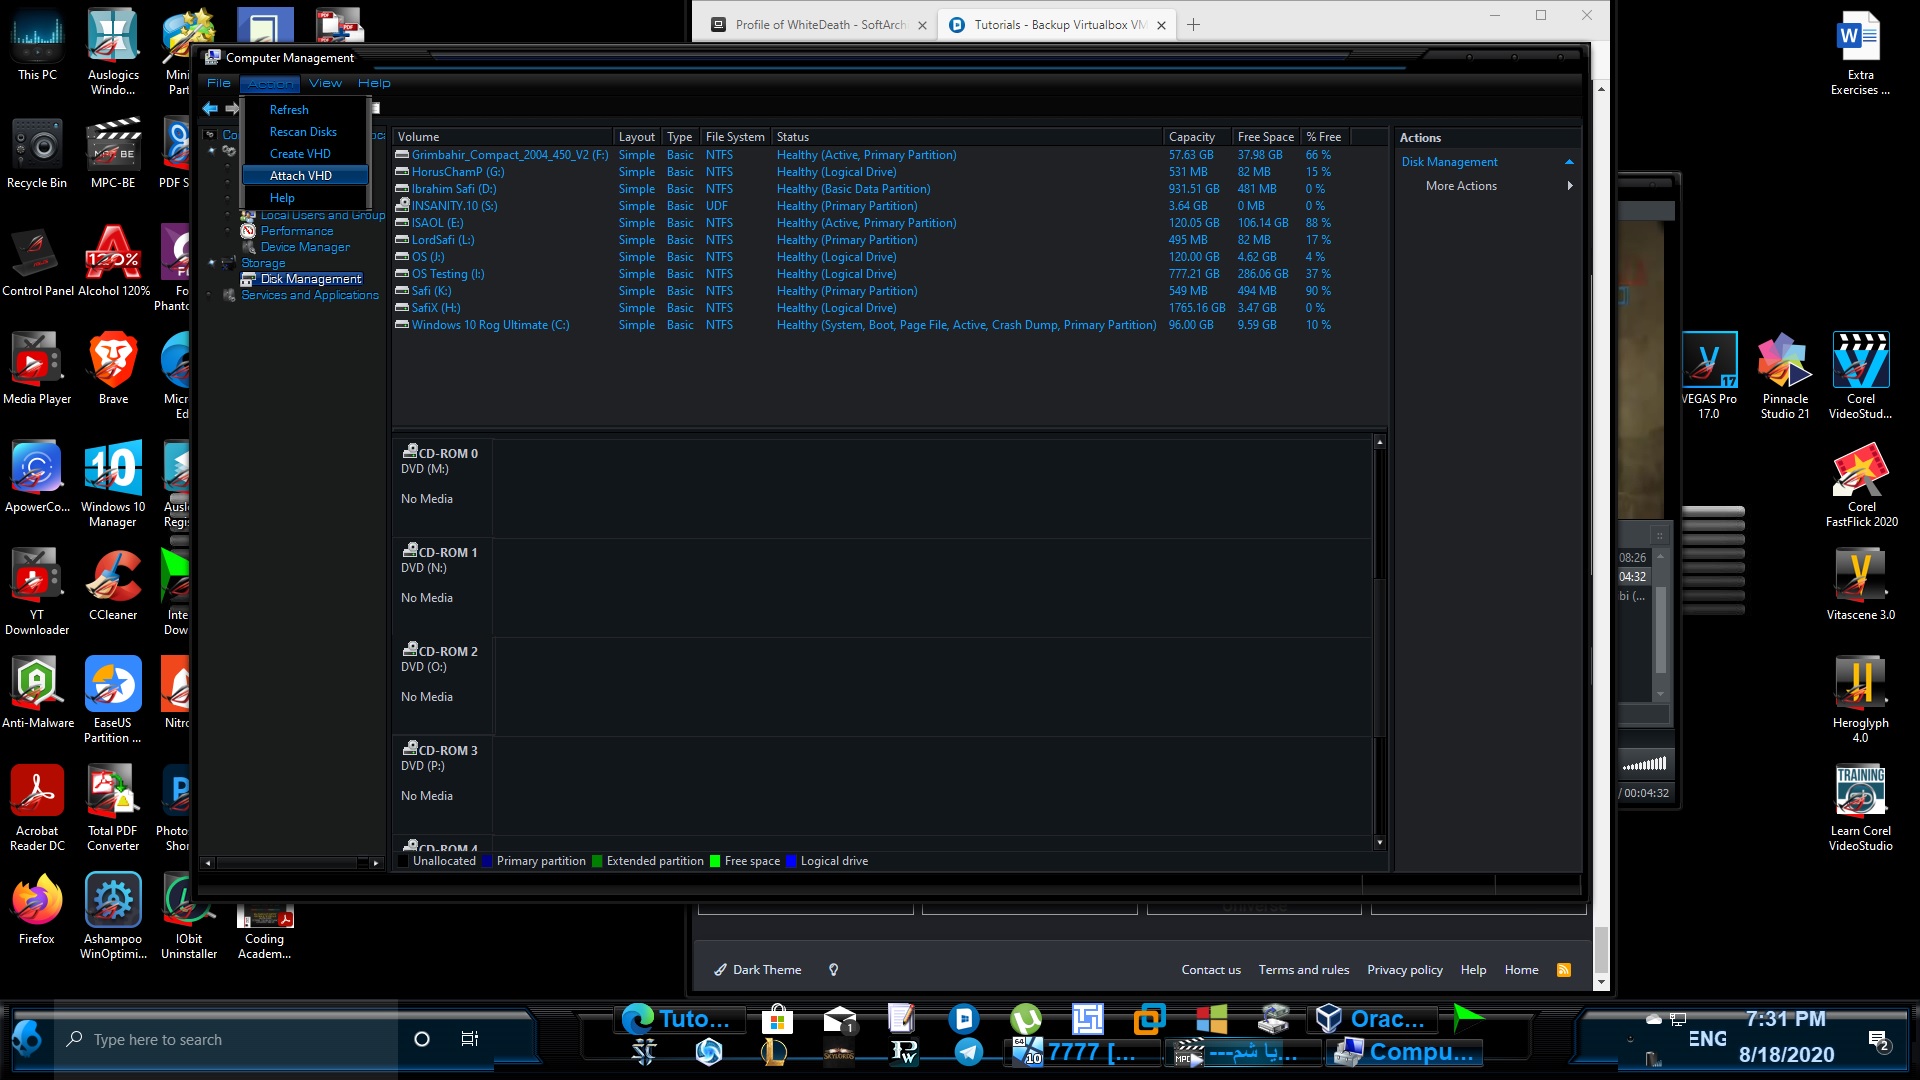
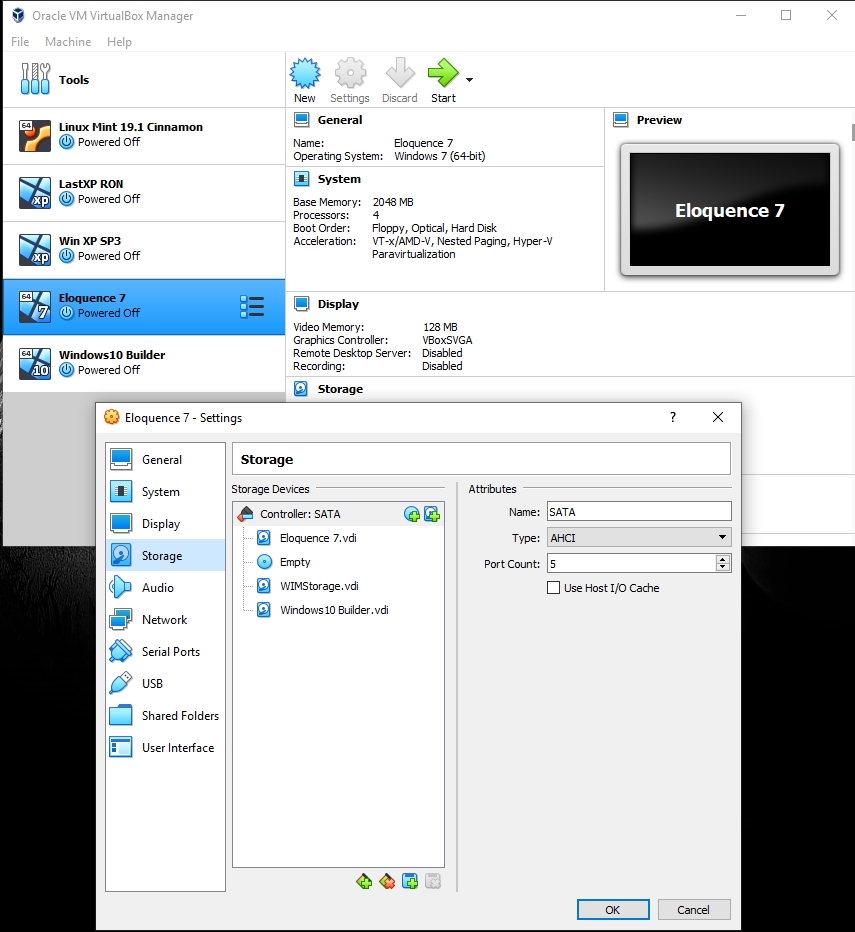
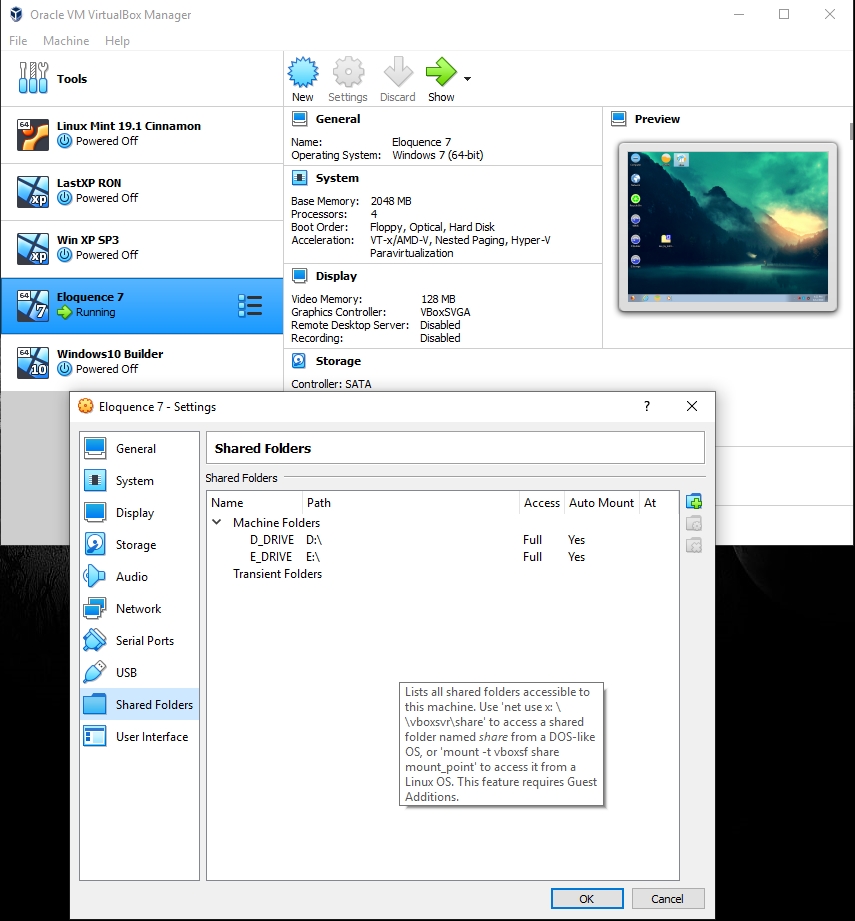
So, I have win 7 installed on first .VDI , a second .VDI for .WIM files to be saved to, and the OS I want to work with (Win10Builder) is setup as an "existing" drive instead of a new drive. I have links to REAL hard drive setup so I can copy the .WIM (or whatever) from VM to real HD.
Listing of OS's
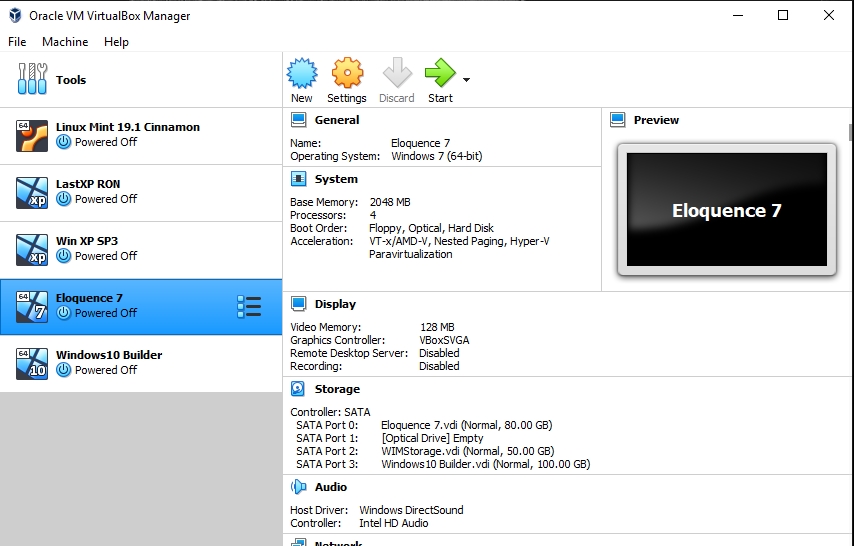
Win7 .VDI list
Real HD links
To backup your VM, load Win7
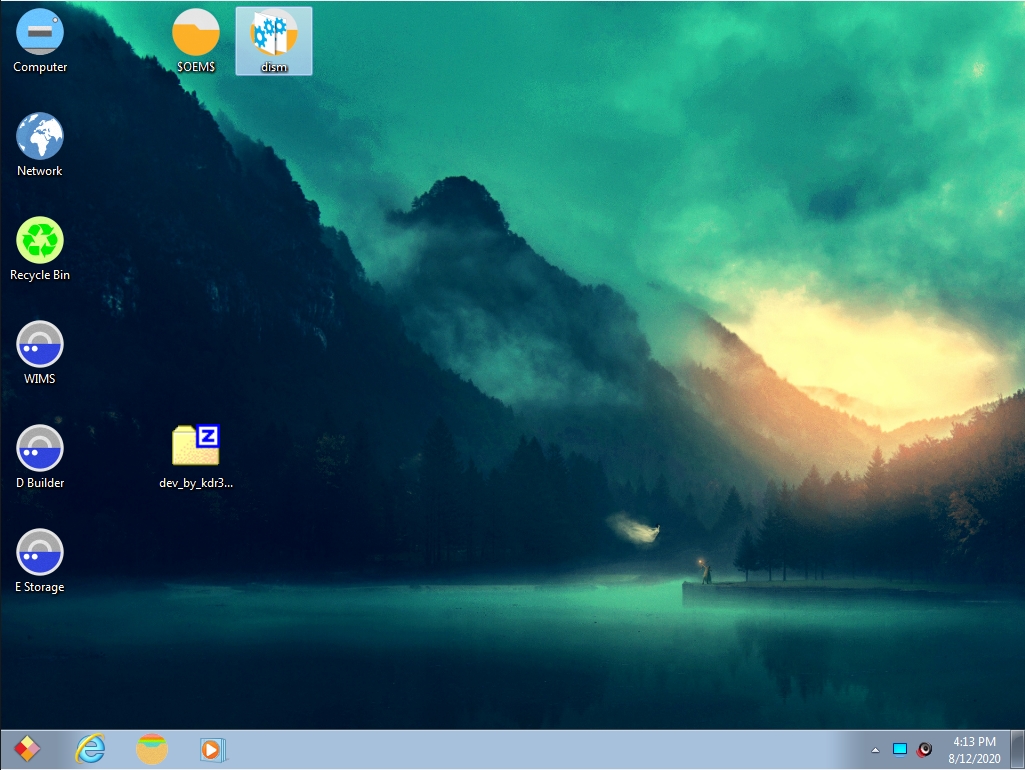
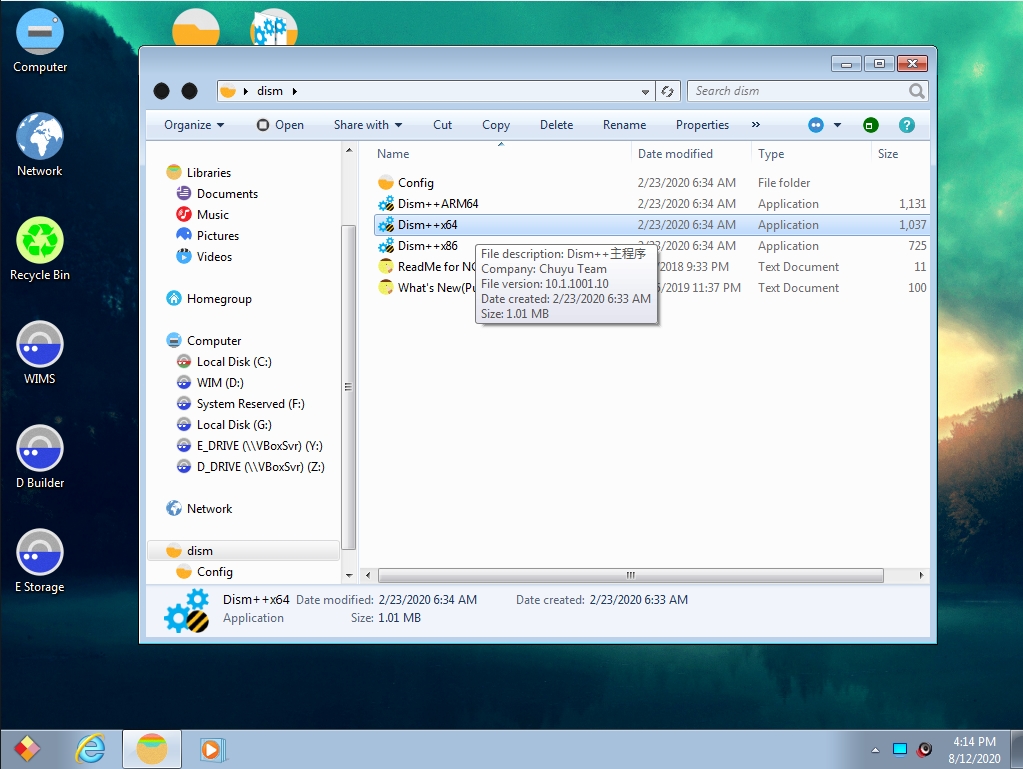
Make sure you have DISM++ copied to a folder in Win7. Open DISM++ by double clicking appropriate
executable (x86, x64, arm)
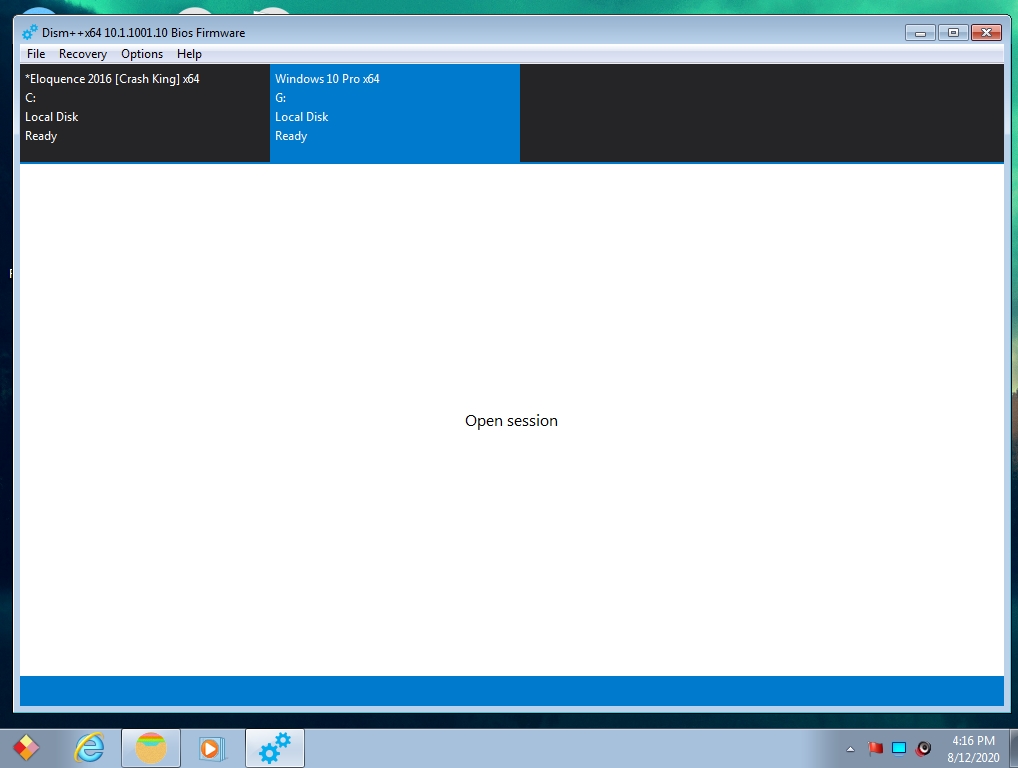
DISM will show a listing at top of current disks with OS's available to work with
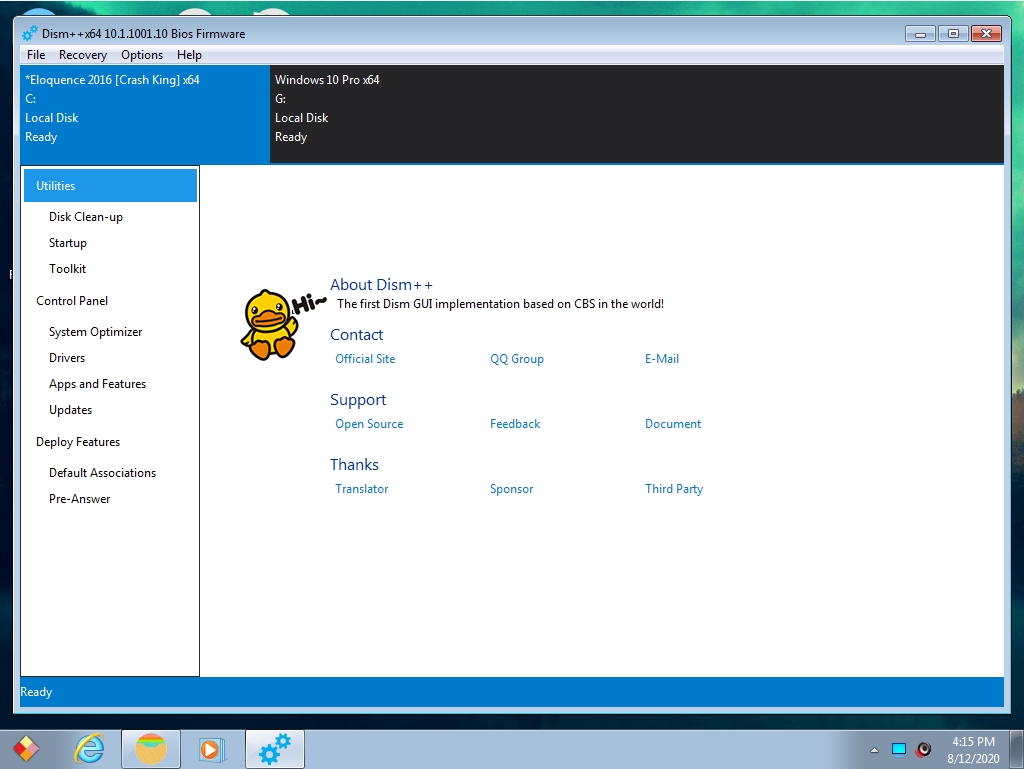
Highlight the one you want to backup (usually not C:\ since thats Win7) and click "Open Session" in the middle of the screen. Click OK on the legacy warning that pops up (if it pops up).
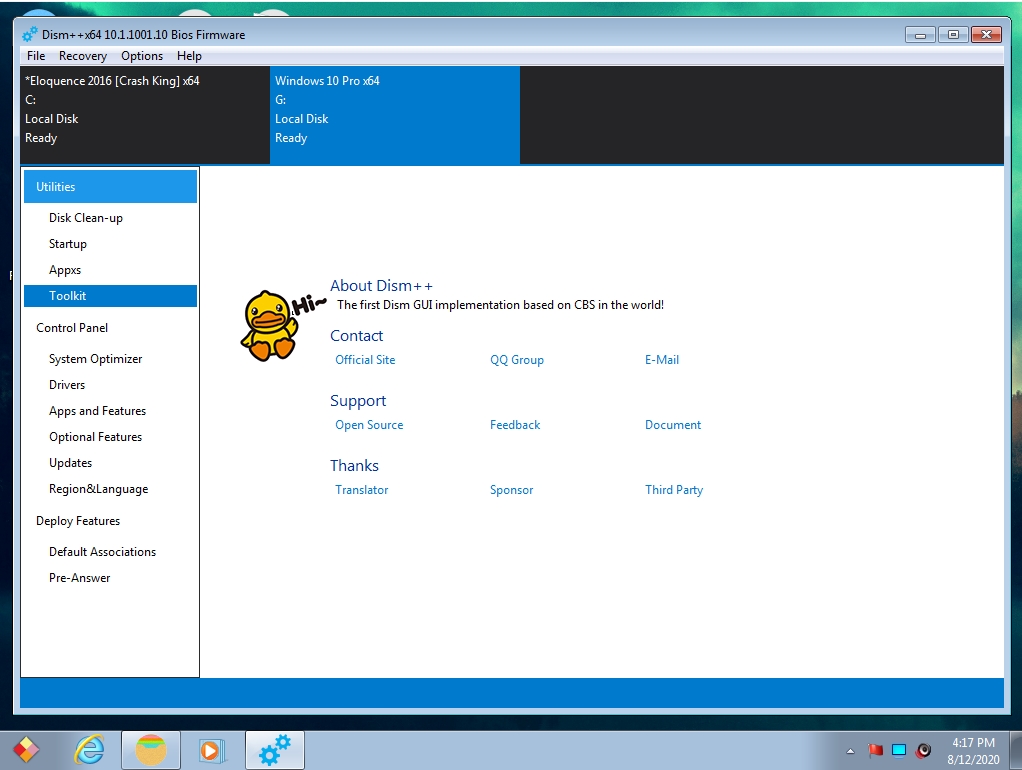
Choose Toolkit from menu on left sidebar
Choose System Backup from icons, and when the window pops up, save as D:\INSTALL.WIM and hit OK (D:\ is the 2nd .vdi we made to save our WIM files to)
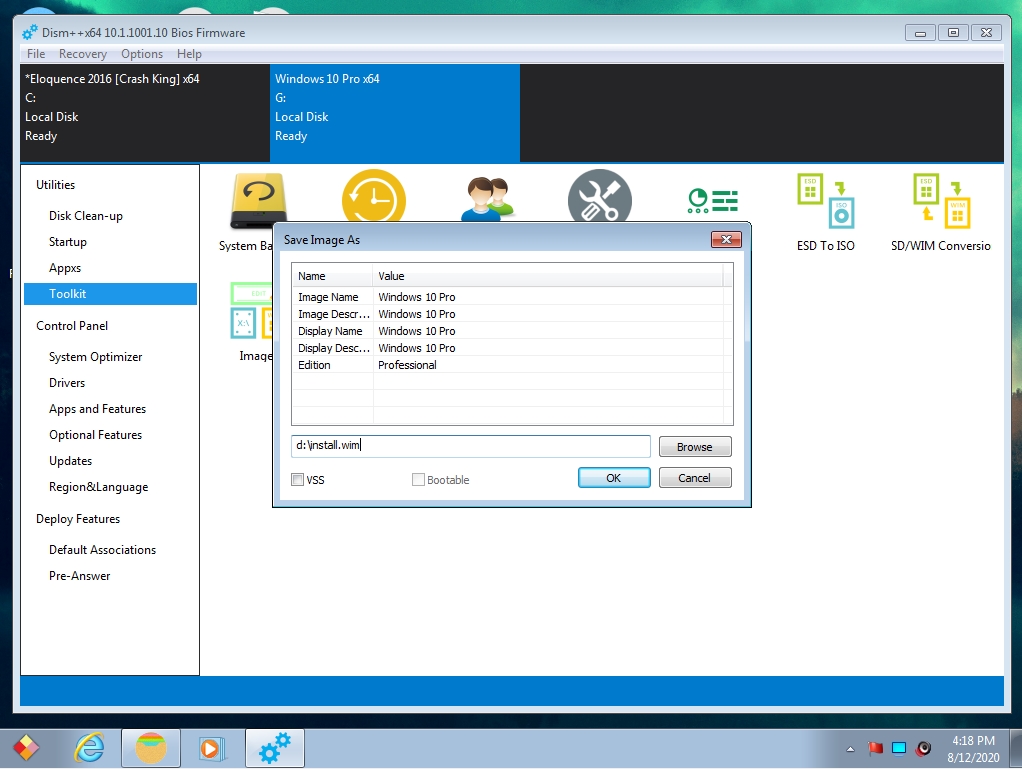
This will run for a while, so get a cup of coffee or make a sandwich and chill for about 15-30 minutes depending on the speed of your machine and hard drives. Once finished, there will be a copy of INSTALL.WIM on the D:\ drive.
Then copy the INSTALL.WIM to your REAL hard drive using the shared folders we setup earlier. Once its there, you can manipulate it, and change it as long as it is in WIM. Cannot change or edit .ESD files yet.
Part 2
If you want to make a bootable ISO....
I use UltraISO for this.
Take an original untouched ISO of windows and use 7zip or similar and extract it to a folder. Make sure the ISO is the SAME version of Windows which you made the .WIM from.
Go into the sources folder and delete INSTALL.ESD or INSTALL.WIM. Then copy your NEW INSTALL.WIM into the sources folder.
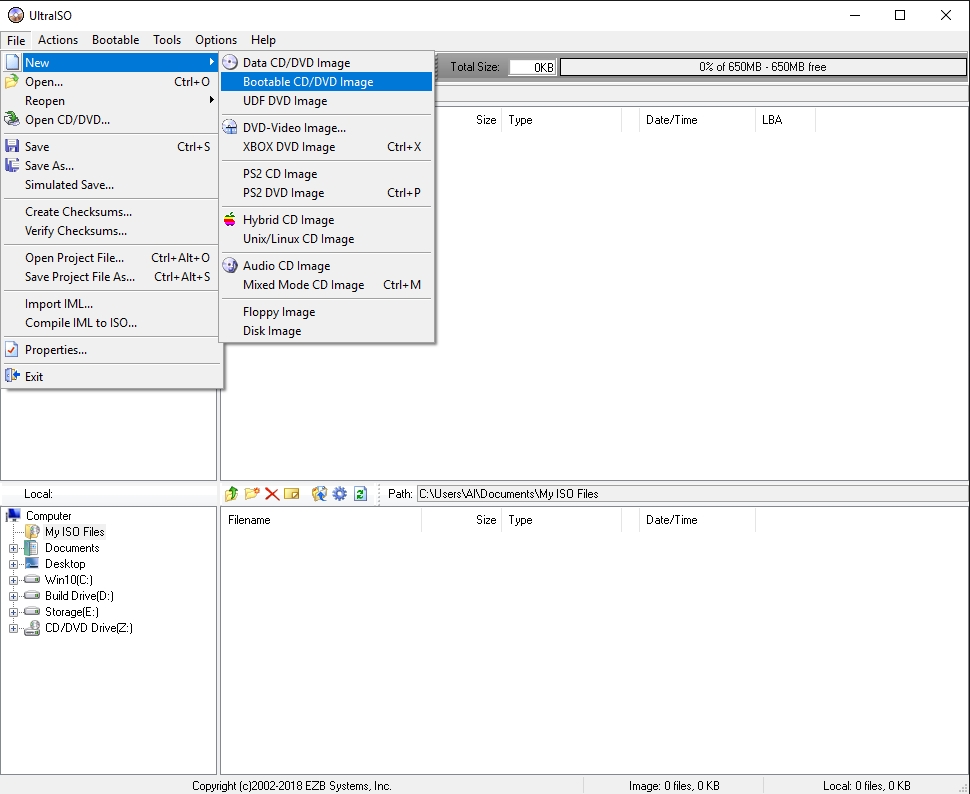
Open UltraISO and choose File\New\Bootable CD/DVD Image.
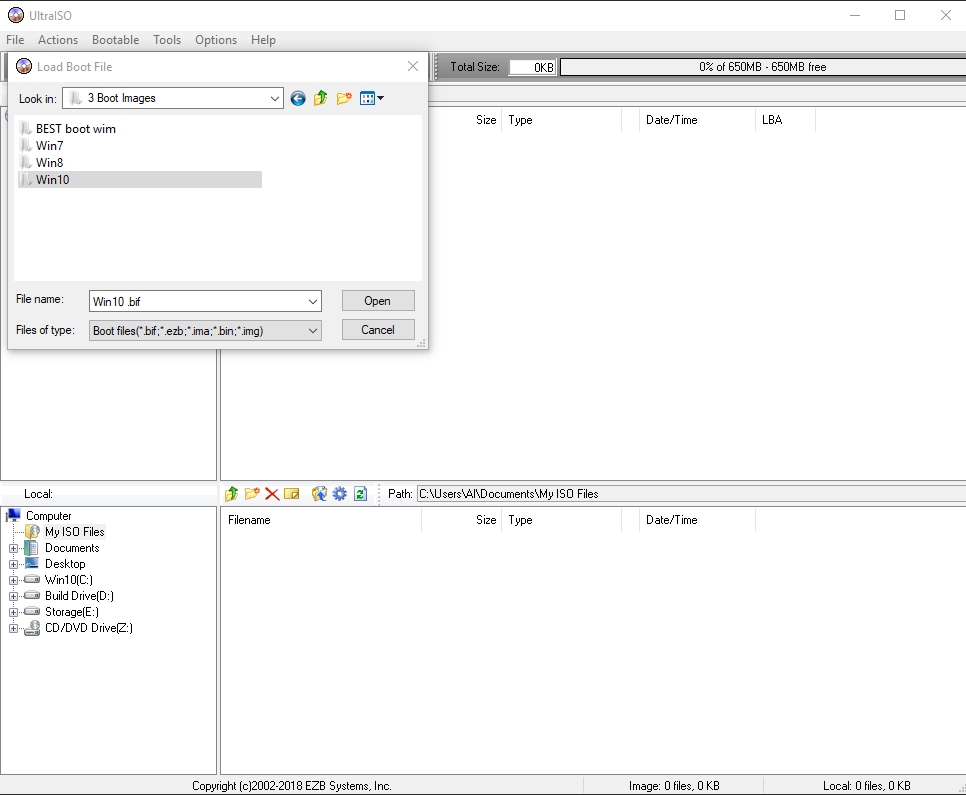
UltraISO will ask for a .BIF file (boot image file). I have one for each, Win7/8/10
Choose the Windows 10 .BIF file
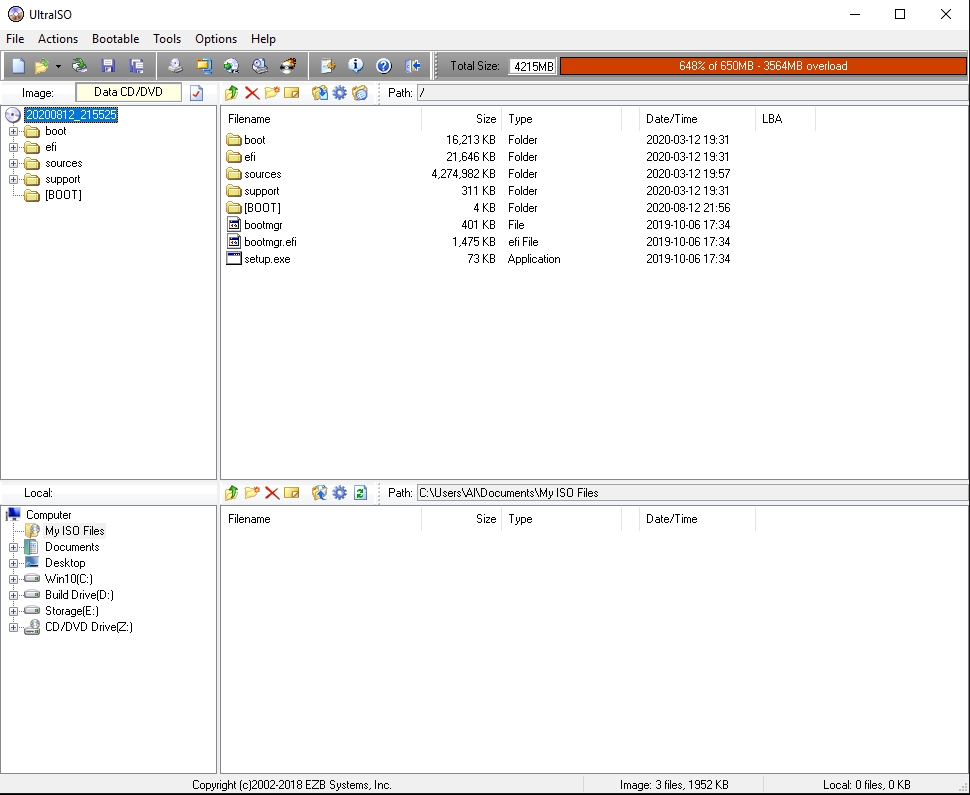
Open an explorer window and drag files we extracted earlier to UltraISO.
Click File\Save As and name your file and save it.
You now have a bootable ISO you can use to install in VM or to a regular hard drive. OS will install with all your programs and settings as they were. You may have to re-install virtualbox guest additions again for the tools it contains, and you will have to reactivate Windows when Installed.
Dism++ link
Boot Image Files (BIF)
Links for DISM++ and my .BIF files are located at bottom of thread
How I do it....
I have a windows 7 made specifically for this. For this example we will use the Win10Builder as the supposed OS we want to backup.
So, I have win 7 installed on first .VDI , a second .VDI for .WIM files to be saved to, and the OS I want to work with (Win10Builder) is setup as an "existing" drive instead of a new drive. I have links to REAL hard drive setup so I can copy the .WIM (or whatever) from VM to real HD.
Listing of OS's
Win7 .VDI list
Real HD links
To backup your VM, load Win7
Make sure you have DISM++ copied to a folder in Win7. Open DISM++ by double clicking appropriate
executable (x86, x64, arm)
DISM will show a listing at top of current disks with OS's available to work with
Highlight the one you want to backup (usually not C:\ since thats Win7) and click "Open Session" in the middle of the screen. Click OK on the legacy warning that pops up (if it pops up).
Choose Toolkit from menu on left sidebar
Choose System Backup from icons, and when the window pops up, save as D:\INSTALL.WIM and hit OK (D:\ is the 2nd .vdi we made to save our WIM files to)
This will run for a while, so get a cup of coffee or make a sandwich and chill for about 15-30 minutes depending on the speed of your machine and hard drives. Once finished, there will be a copy of INSTALL.WIM on the D:\ drive.
Then copy the INSTALL.WIM to your REAL hard drive using the shared folders we setup earlier. Once its there, you can manipulate it, and change it as long as it is in WIM. Cannot change or edit .ESD files yet.
Part 2
If you want to make a bootable ISO....
I use UltraISO for this.
Take an original untouched ISO of windows and use 7zip or similar and extract it to a folder. Make sure the ISO is the SAME version of Windows which you made the .WIM from.
Go into the sources folder and delete INSTALL.ESD or INSTALL.WIM. Then copy your NEW INSTALL.WIM into the sources folder.
Open UltraISO and choose File\New\Bootable CD/DVD Image.
UltraISO will ask for a .BIF file (boot image file). I have one for each, Win7/8/10
Choose the Windows 10 .BIF file
Open an explorer window and drag files we extracted earlier to UltraISO.
Click File\Save As and name your file and save it.
You now have a bootable ISO you can use to install in VM or to a regular hard drive. OS will install with all your programs and settings as they were. You may have to re-install virtualbox guest additions again for the tools it contains, and you will have to reactivate Windows when Installed.
Dism++ link
You must be registered for see links
Boot Image Files (BIF)
You must be registered for see links


")