- Downloaded
- 5.7 GB
- Uploaded
- 448.6 GB
- Ratio
- 78.11
- Seedbonus
- 134,973
- Upload Count
- 217 (223)
Member for 5 years
How to Change or Customize Your Icons in Windows
A) Changing System Desktop Icons

1 Open Start. Click the Windows logo in the bottom-left corner of the screen, or press the ⊞ Win key.
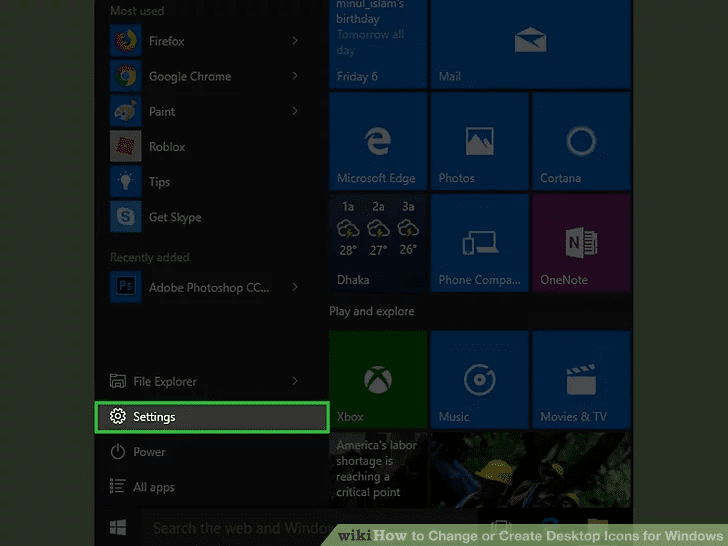
2 Click Settings. It's in the lower-left side of the Start window.
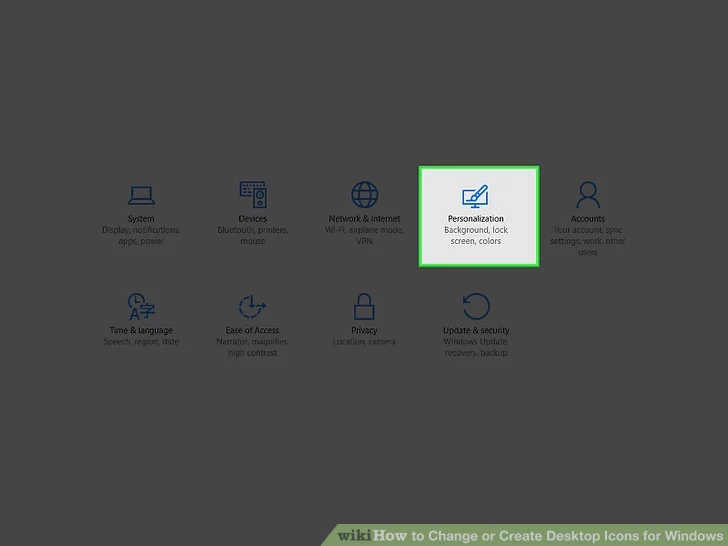
3 Click Personalization. This is the monitor-shaped icon on the Windows Settings page.
You can also access this page by right-clicking a blank space on the desktop and then clicking Personalization in the drop-down menu.
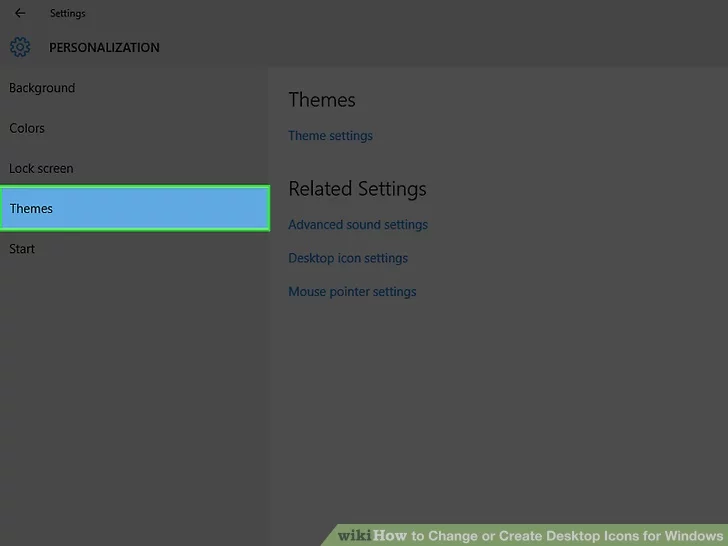
4 Click Themes. It's a tab on the left side of the Personalization window.
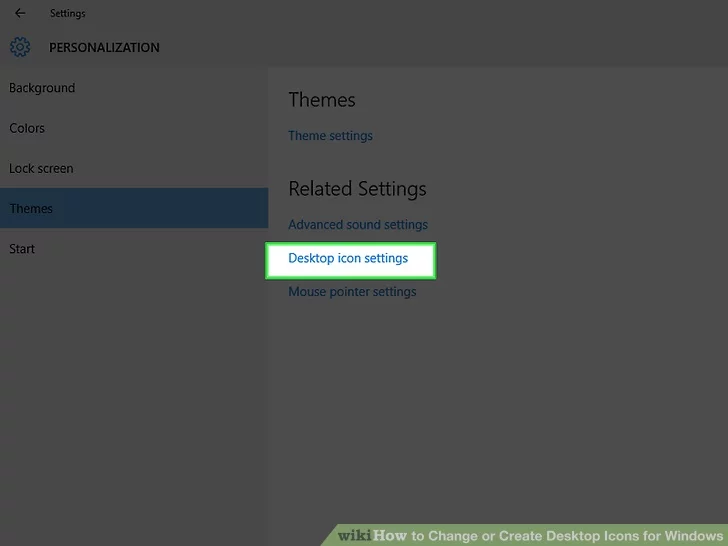
5 Click Desktop icon settings. This link is in the upper-right side of the Themes page. Clicking it opens the Desktop Icon Settings window.
If you haven't edited your theme at all, this link will be in the middle of the page beneath the "Related Settings" heading.
You can also click Get more themes in the Store below the "Apply a theme" heading to browse desktop themes. Some themes will change your desktop icons' appearances.
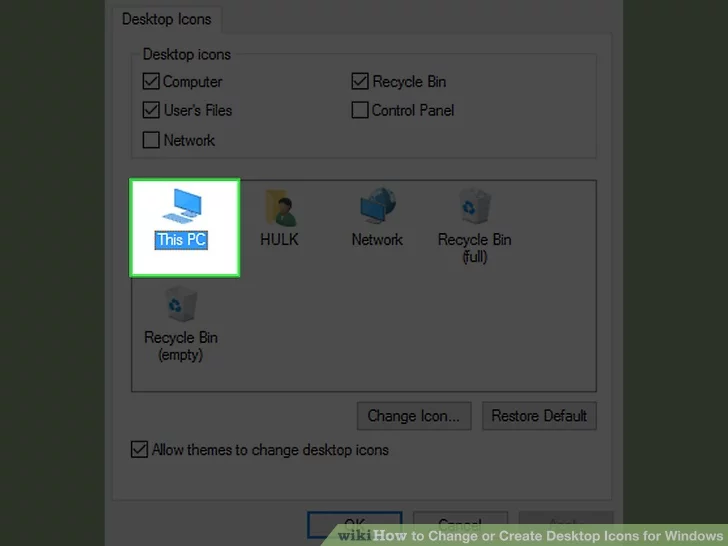
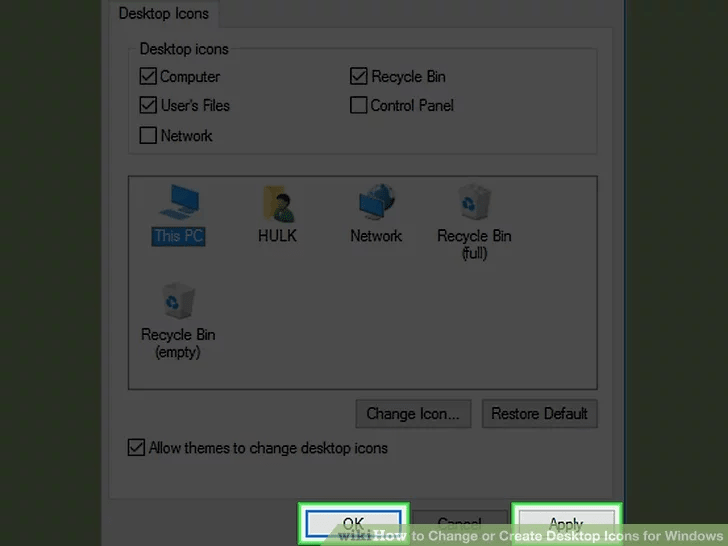
6 Click an icon you want to change. This will select the icon.
For example, you might click This PC or Recycle Bin.
You can also check the box next to a desktop icon's name at the top of the window to make it appear on your desktop, or uncheck the box to remove it from the desktop.
Check the "Allow themes to change desktop icons" box on this window to enable theme-related icon changes.
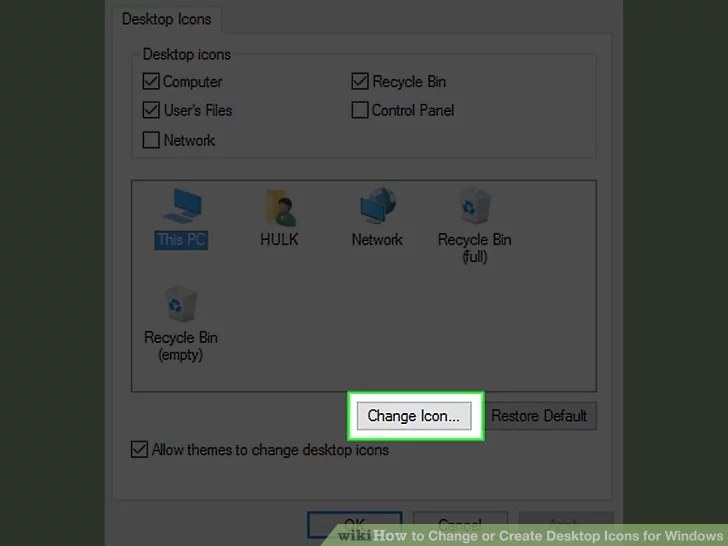
7 Click Change Icon. It's near the bottom of the window.
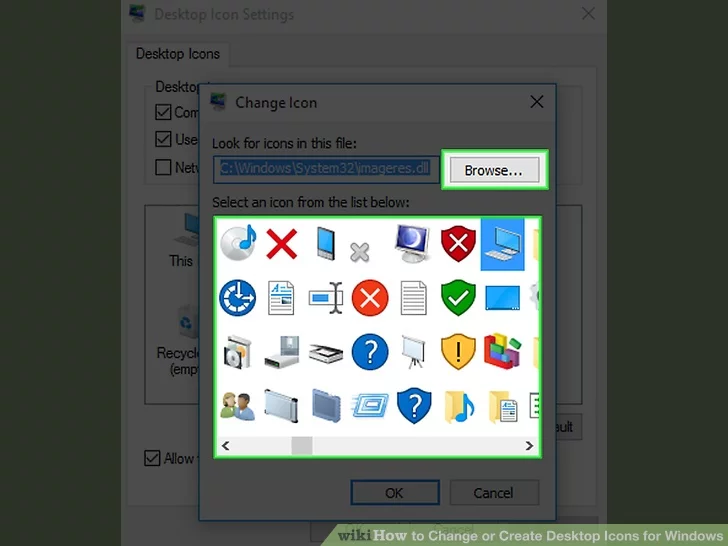
8 Select an icon. You can select two different types of icons:
System icon - Click an icon in the window.
Custom icon - Click Browse, then click the folder that your custom icons are in on the left side of the window. Select the icon you want to use, then click Open.

9 Click OK. This will assign your selected icon to the desktop program.

10 Click Apply, then click OK. Doing so confirms your decision and changes the desktop program's icon to your selected icon.
B) Changing Shortcut and Folder Icons
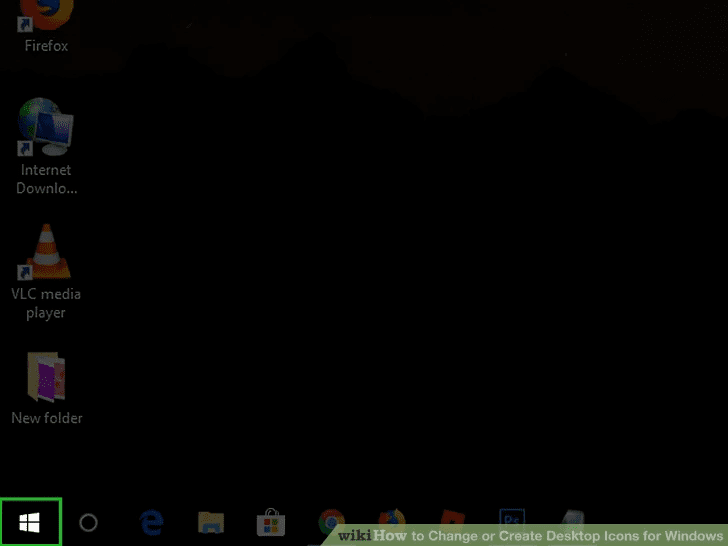
1 Open Start. Click the Windows logo in the bottom-left corner of the screen, or press ⊞ Win.
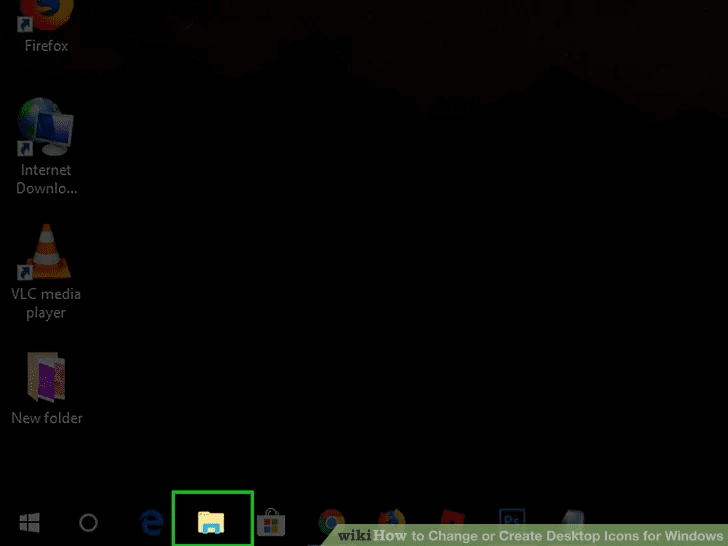
2 Click the File Explorer. You'll find this icon on the far-left side of the Start window.
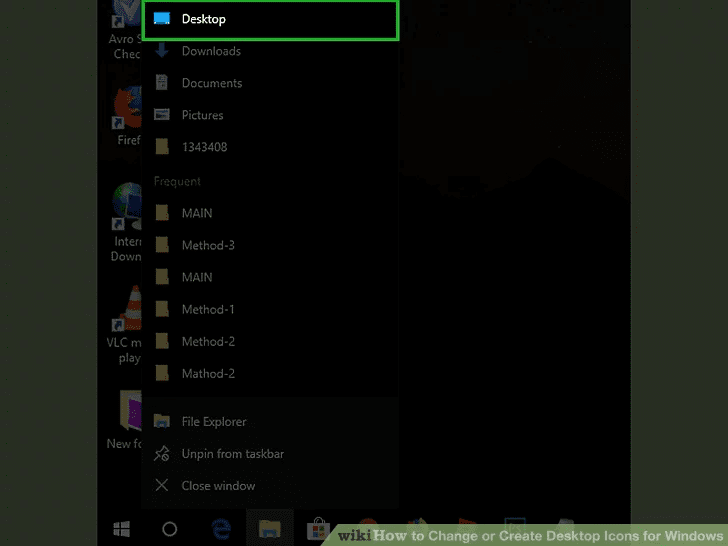
3 Click Desktop. It's a folder in the left-hand column of options in the File Explorer window.
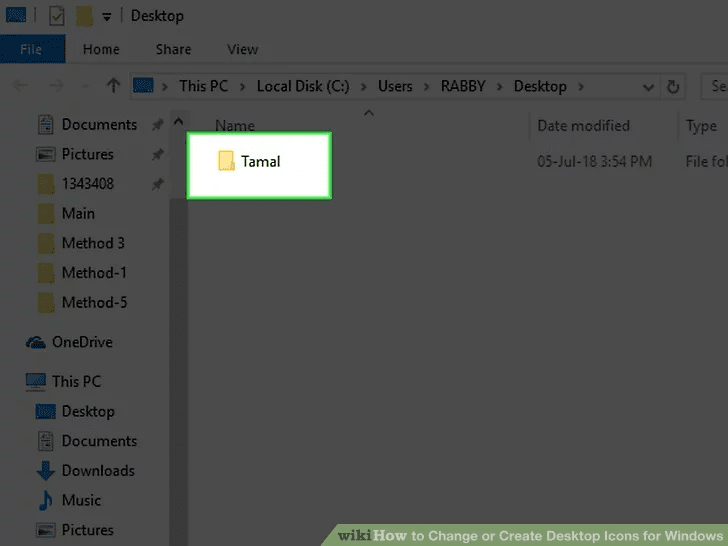
4 Click a shortcut or folder icon. Shortcut icons have a white box with an arrow in their lower-left corners.
You cannot change the icons of specific files (e.g., Notepad files or .exe files) using this method.
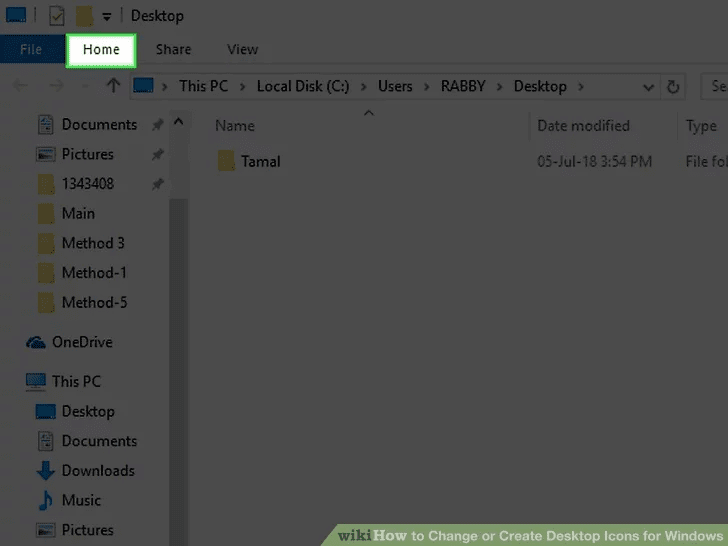
5 Click the Home tab. It's in the upper-left corner of the File Explorer window. Doing so will open a toolbar at the top of the window.
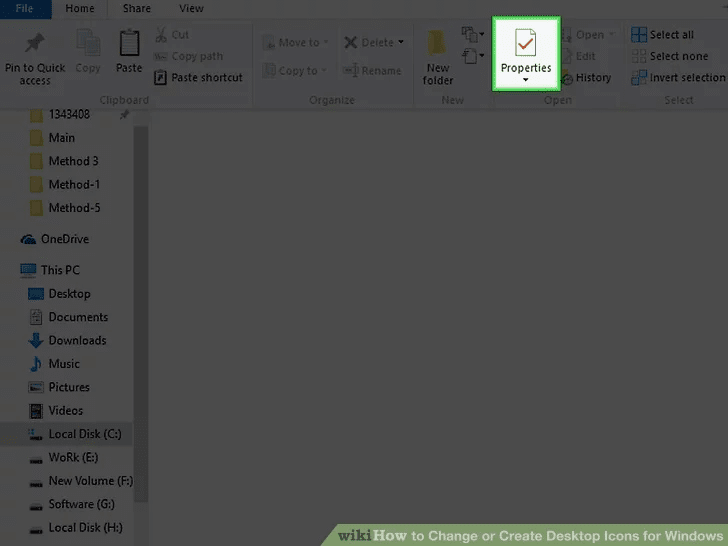
6 Click Properties. This is a white box with a red checkmark in the "Open" section of the toolbar.
You can also right-click on the icon on your desktop and then click Properties to get to this menu.
7 Open the icon's "Change Icon" window. This process will vary depending on the type of icon you're editing:
Shortcut - Click the Shortcut tab at the top of the Properties window, then click Change Icon near the bottom of the window.
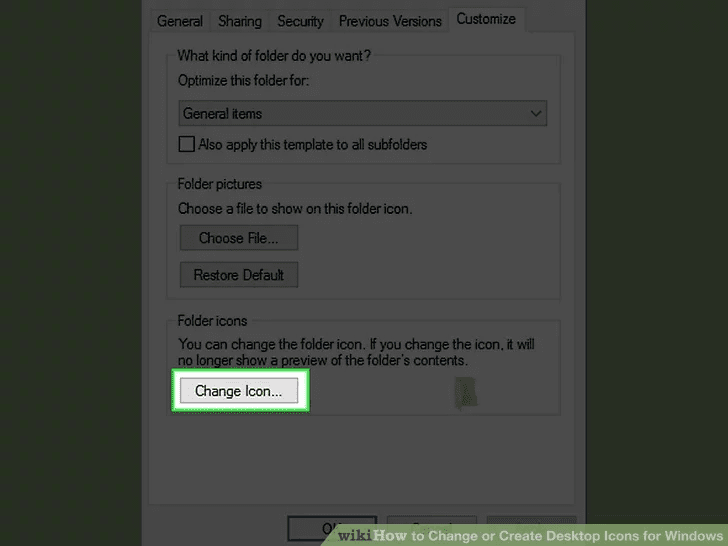
Folder - Click the Customize tab at the top of the Properties window, then click Change Icon near the bottom of the window.

8 Select an icon. You can select two different types of icons:
System icon - Click an icon in the window.
Custom icon - Click Browse, then click the folder that your custom icons are in on the left side of the window. Select the icon you want to use, then click Open.
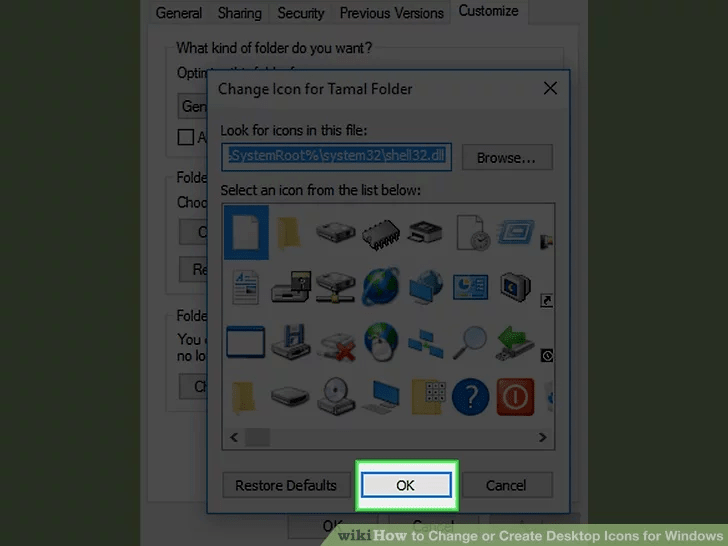
9 Click OK. This will assign your selected icon.
10 Click Apply, then click OK. Doing so confirms your decision and changes the original icon to your selected icon.
C) Installing icon pack
To install icon pack see
Credits: wikiHow
A) Changing System Desktop Icons
1 Open Start. Click the Windows logo in the bottom-left corner of the screen, or press the ⊞ Win key.
2 Click Settings. It's in the lower-left side of the Start window.
3 Click Personalization. This is the monitor-shaped icon on the Windows Settings page.
You can also access this page by right-clicking a blank space on the desktop and then clicking Personalization in the drop-down menu.
4 Click Themes. It's a tab on the left side of the Personalization window.
5 Click Desktop icon settings. This link is in the upper-right side of the Themes page. Clicking it opens the Desktop Icon Settings window.
If you haven't edited your theme at all, this link will be in the middle of the page beneath the "Related Settings" heading.
You can also click Get more themes in the Store below the "Apply a theme" heading to browse desktop themes. Some themes will change your desktop icons' appearances.
6 Click an icon you want to change. This will select the icon.
For example, you might click This PC or Recycle Bin.
You can also check the box next to a desktop icon's name at the top of the window to make it appear on your desktop, or uncheck the box to remove it from the desktop.
Check the "Allow themes to change desktop icons" box on this window to enable theme-related icon changes.
7 Click Change Icon. It's near the bottom of the window.
8 Select an icon. You can select two different types of icons:
System icon - Click an icon in the window.
Custom icon - Click Browse, then click the folder that your custom icons are in on the left side of the window. Select the icon you want to use, then click Open.
9 Click OK. This will assign your selected icon to the desktop program.
10 Click Apply, then click OK. Doing so confirms your decision and changes the desktop program's icon to your selected icon.
B) Changing Shortcut and Folder Icons
1 Open Start. Click the Windows logo in the bottom-left corner of the screen, or press ⊞ Win.
2 Click the File Explorer. You'll find this icon on the far-left side of the Start window.
3 Click Desktop. It's a folder in the left-hand column of options in the File Explorer window.
4 Click a shortcut or folder icon. Shortcut icons have a white box with an arrow in their lower-left corners.
You cannot change the icons of specific files (e.g., Notepad files or .exe files) using this method.
5 Click the Home tab. It's in the upper-left corner of the File Explorer window. Doing so will open a toolbar at the top of the window.
6 Click Properties. This is a white box with a red checkmark in the "Open" section of the toolbar.
You can also right-click on the icon on your desktop and then click Properties to get to this menu.
7 Open the icon's "Change Icon" window. This process will vary depending on the type of icon you're editing:
Shortcut - Click the Shortcut tab at the top of the Properties window, then click Change Icon near the bottom of the window.
Folder - Click the Customize tab at the top of the Properties window, then click Change Icon near the bottom of the window.
8 Select an icon. You can select two different types of icons:
System icon - Click an icon in the window.
Custom icon - Click Browse, then click the folder that your custom icons are in on the left side of the window. Select the icon you want to use, then click Open.
9 Click OK. This will assign your selected icon.
10 Click Apply, then click OK. Doing so confirms your decision and changes the original icon to your selected icon.
C) Installing icon pack
To install icon pack see
You must be registered for see links
Credits: wikiHow
Last edited:
 So that's how it's done. Thanks for this
")