 Mr Grimbahir
🔰 OS Forge Master - May he rest in peace 🔰
⚡OS Master
Uploader
Power User
Windows Modifier
✅ Verified Member
- Downloaded
- 108.9 GB
- Uploaded
- 18.7 TB
- Ratio
- 175.96
- Seedbonus
- 69,433
- Upload Count
- 52 (76)
Member for 4 years
Hi all my dear brothers and sisters,
- This is my first tutorial concerning the topic "How to customize your own windows: themes, icons packs, wallpapers, desktop arrangements, programs"
- The things I am going to show are all applied on my customized Windows 10.
- There are things that are not included in this tutorial: windows 10 installation process, modifications of dlls and capture of the image process (although I will suggest some applications to do such things)
- First,
We need to install windows 10 in a virtual machine (of your choice. For me I use Oracle Virtualbox) until we reach that point in installation (OOBE) and we press (LEFT CONTROL + SHIFT + F3):
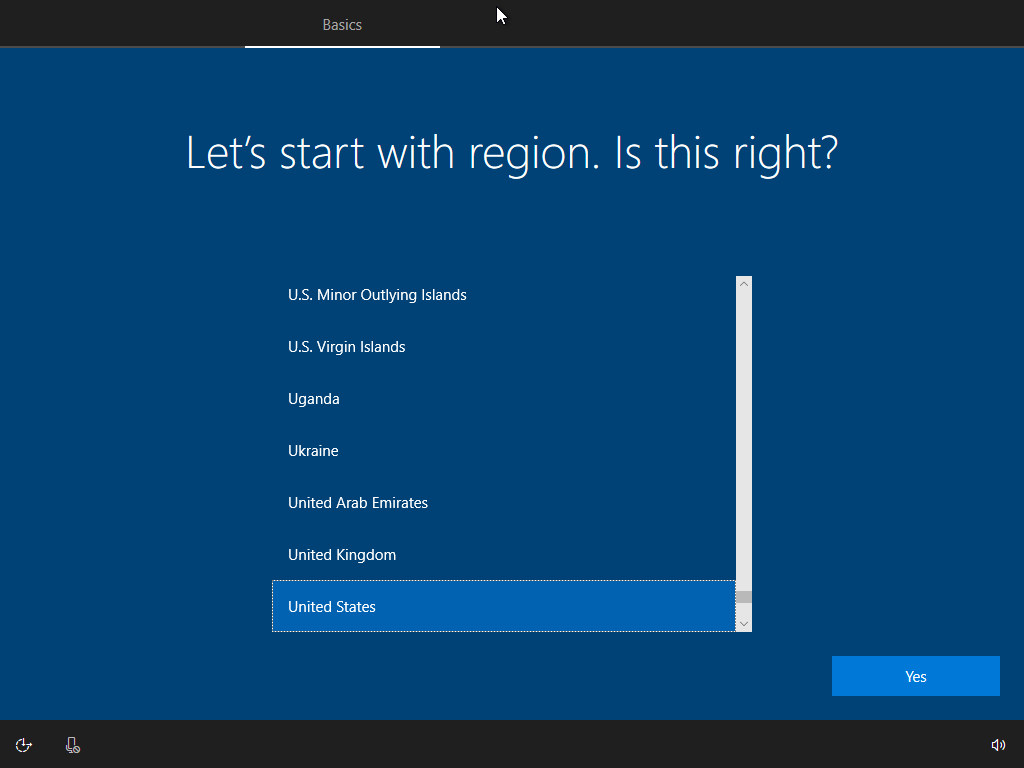
Now we are entering a mode called (Audit mode). We wait till the desktop appear.
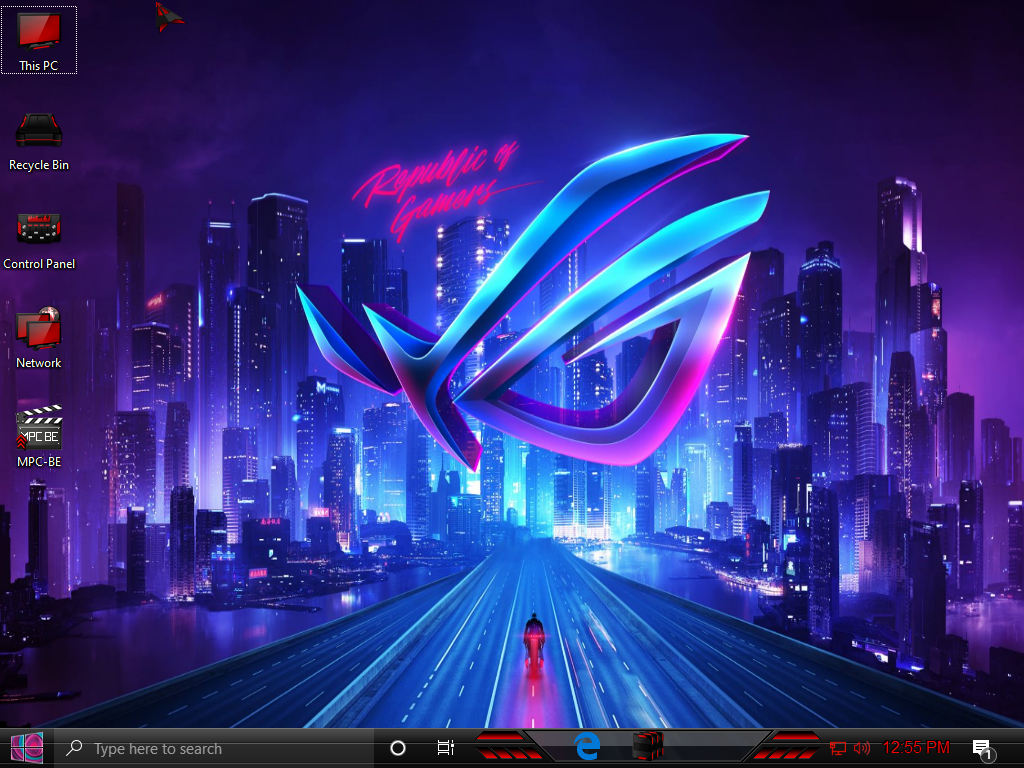
- Second (Visual customizations: themes, icons and wallpapers):
There are three main programs you need to install before you can customize visual appearance (search for them in our forum)
(1) StartIsBack.AIO.1.0.1
(2) OldNewExplorer (You could uncheck the first two in the first section)

(3) UltraUXThemePatcher
Then you reboot your system in the virtual machine.
Now, you could put the themes you want in the following path:
C:\Windows\Resources\Themes
You can use the icon pack you want (You could use "7tsp explorer.exe fix by Moonnique® " and the supported icon packs)
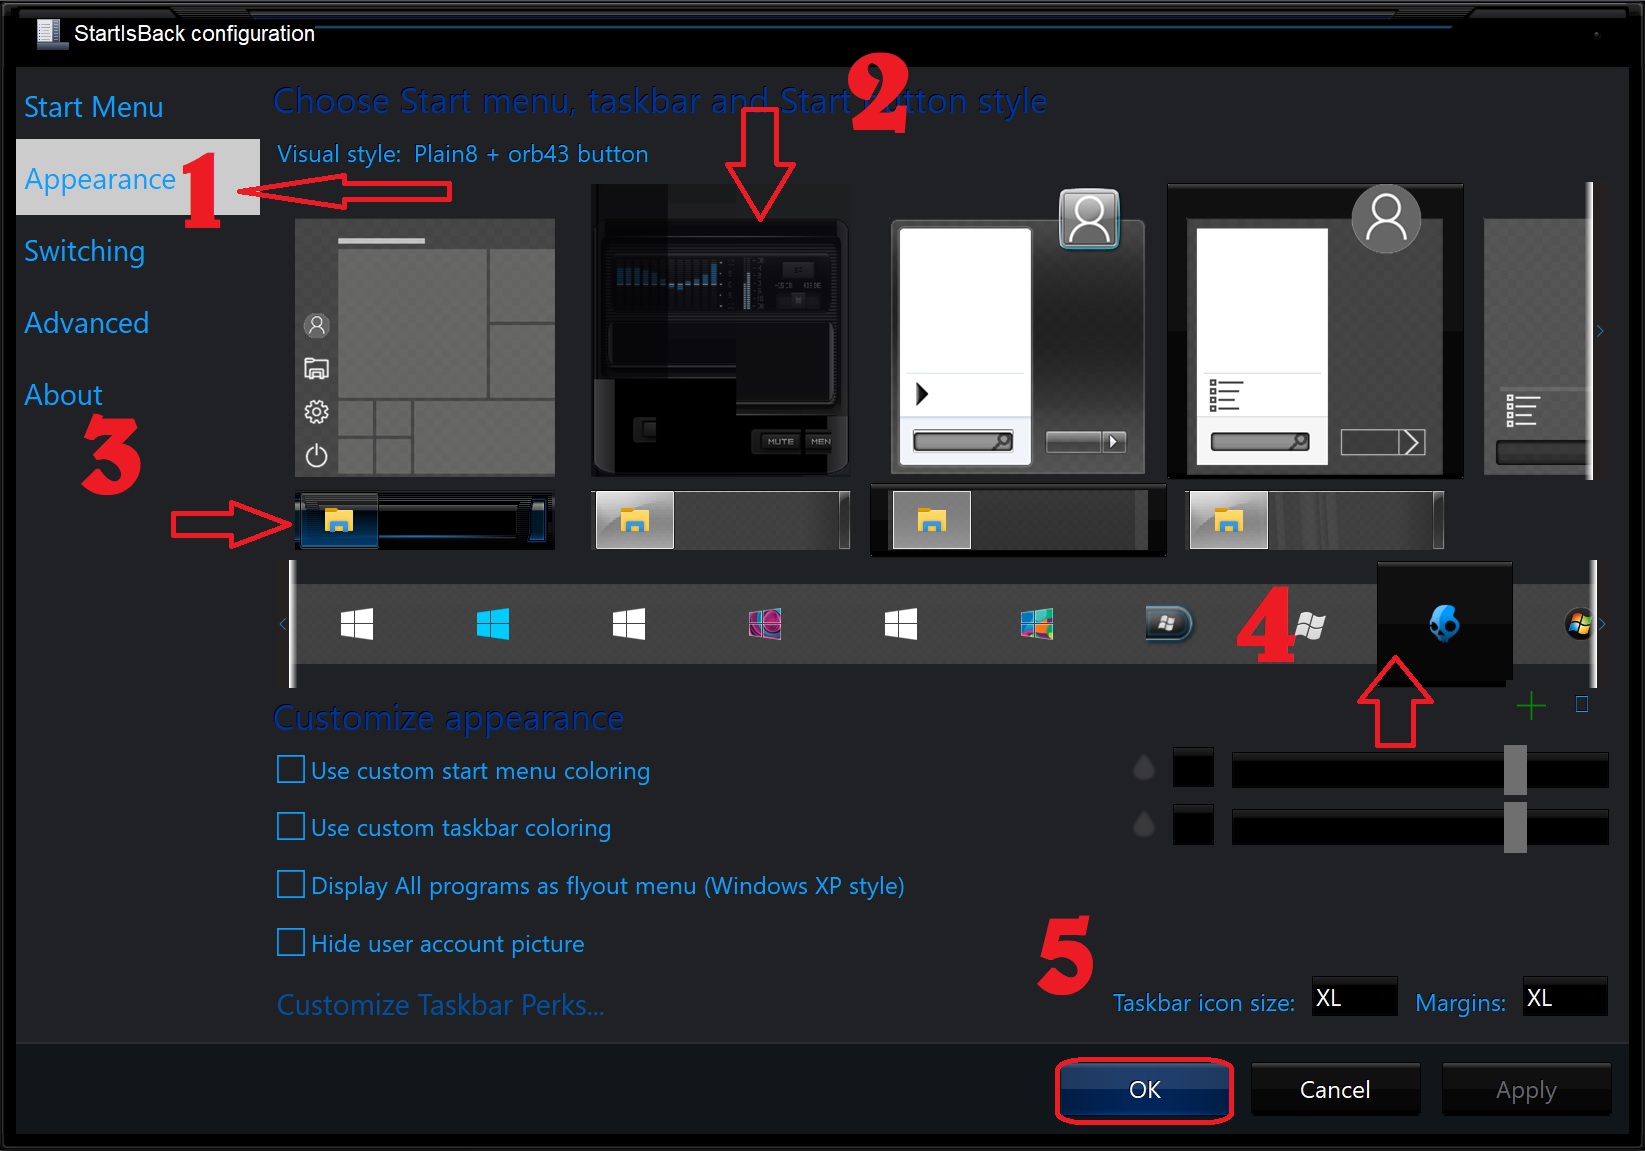
You can configure StartisBack
Now you can put the wallpapers you want in the following path and choose what you need to be the default desktop wallpaper or you can make them appear in a Slideshow and adjust the timer:
C:\Windows\Web\Wallpaper
-Third install all the application you want (office, adobe reader, any runtimes, .........)
After you do all the things you would like to customize even setting your browser homepage, you can cleanup drive c:\ by right click on it and click on properties
- Now make a txt file and name it copyprofile for example.
- Then change txt to xml. The file will seem like that (copyprofile.xml).
You can find it here:
- Paste it in copyprofile.xml
- Put the copyprofile.xml in the root of any drive except for the c:\ drive.
- Run (cmd) as an administrator and use the following command:
C:\Windows\System32\Sysprep\Sysprep /generalize /oobe /shutdown /unattend:x:\CopyProfile.xml
x= the drive where you put the file
- Don't make anything during (sysprep) is running even moving the mouse.
- After the Virtual machine is off, you can mount the virtual drive and then capture your image with all the customizations you have done.
Thanks so much and pardon my mistakes.
- This is my first tutorial concerning the topic "How to customize your own windows: themes, icons packs, wallpapers, desktop arrangements, programs"
- The things I am going to show are all applied on my customized Windows 10.
- There are things that are not included in this tutorial: windows 10 installation process, modifications of dlls and capture of the image process (although I will suggest some applications to do such things)
- First,
We need to install windows 10 in a virtual machine (of your choice. For me I use Oracle Virtualbox) until we reach that point in installation (OOBE) and we press (LEFT CONTROL + SHIFT + F3):
Now we are entering a mode called (Audit mode). We wait till the desktop appear.
- Second (Visual customizations: themes, icons and wallpapers):
There are three main programs you need to install before you can customize visual appearance (search for them in our forum)
(1) StartIsBack.AIO.1.0.1
(2) OldNewExplorer (You could uncheck the first two in the first section)
(3) UltraUXThemePatcher
Then you reboot your system in the virtual machine.
Now, you could put the themes you want in the following path:
C:\Windows\Resources\Themes
You can use the icon pack you want (You could use "7tsp explorer.exe fix by Moonnique® " and the supported icon packs)
You can configure StartisBack
Now you can put the wallpapers you want in the following path and choose what you need to be the default desktop wallpaper or you can make them appear in a Slideshow and adjust the timer:
C:\Windows\Web\Wallpaper
-Third install all the application you want (office, adobe reader, any runtimes, .........)
After you do all the things you would like to customize even setting your browser homepage, you can cleanup drive c:\ by right click on it and click on properties
- Now make a txt file and name it copyprofile for example.
- Then change txt to xml. The file will seem like that (copyprofile.xml).
You can find it here:
You must be registered for see links
- Copy
XML:
<?xml version="1.0" encoding="utf-8"?><unattend xmlns="urn:schemas-microsoft-com:unattend">
<settings pass="specialize">
<component name="Microsoft-Windows-Shell-Setup" processorArchitecture="amd64" publicKeyToken="31bf3856ad364e35" language="neutral" versionScope="nonSxS" xmlns:wcm="http://schemas.microsoft.com/WMIConfig/2002/State" xmlns:xsi="http://www.w3.org/2001/XMLSchema-instance">
<CopyProfile>true</CopyProfile>
</component>
</settings>
<cpi:offlineImage cpi:source="wim:D:/sources/install.wim#Windows 10 Pro" xmlns:cpi="urn:schemas-microsoft-com:cpi" />
</unattend>
- Paste it in copyprofile.xml
- Put the copyprofile.xml in the root of any drive except for the c:\ drive.
- Run (cmd) as an administrator and use the following command:
C:\Windows\System32\Sysprep\Sysprep /generalize /oobe /shutdown /unattend:x:\CopyProfile.xml
x= the drive where you put the file
- Don't make anything during (sysprep) is running even moving the mouse.
- After the Virtual machine is off, you can mount the virtual drive and then capture your image with all the customizations you have done.
Thanks so much and pardon my mistakes.
Enjoy life in the right way as no one lives forever.
Last edited:

")